Powered by Blogger.

Thursday, August 10, 2017

লিনাক্সে Samba ইন্সটল এবং কনফিগার করি


Samba is the standard Windows interoperability suite of programs for Linux and Unix.[1]
মানে Samba Windows আর Linux  সিস্টেমের মধ্যে তথ্য আদান-প্রদানের মাধ্যম।
share folder Linux to windows
source: The Hacker News


অনেকেই এই তথ্য আদান-প্রদান করতে গিয়ে প্রথম যে সমস্যায় পরে তা হল Samba ইন্সটল করা। আজকে আমরা দেখব কিভাবে লিনাক্সে Samba ইন্সটল এবং কনফিগার করা যায়। (বিভিন্ন সমস্যার আলোকপাত সহ)

নোটঃ এখানে আমরা Debian based সিস্টেম নিয়ে আলোচনা করব।

১/ প্রথমেই Terminal খুলে নিচের Command গুলো দিন।

sudo apt-get update
sudo apt-get install samba samba-common python-glade2 system-config-samba
sudo touch /etc/libuser.conf
sudo chmod 777 /etc/libuser.conf


এতে করে আপনার সিস্টেমে ইন্সটল হয়ে যাবে। [link of bash file]

২/ এবার আপনার ফাইল শেয়ার করতে পারবেন। কিন্তু এখানে একটু সমস্যা আছে। আপনি শুধু আপনার সিস্টেম  ড্রাইভের ফাইলগুলো শেয়ার করতে পারবেন। কিন্তু অন্যান্য ড্রাইভে থাকা ফাইল শেয়ার করতে পারবেন না। এজন্য প্রথমে নিচের Command গুলো দিন।
sudo apt-get update
sudo apt-get install gedit
sudo gedit /etc/samba/smb.conf

নতুন একটি উইন্ডো খুলবে। এবার [global] এর পরে নিচের লাইনটি কপি-পেস্ট করুন।
wins support = yes

৩/ এবার সেভ করে Samba রিস্টার্ট দিন। Samba রিস্টার্ট দিতে নিচের Command গুলোদিন।
sudo systemctl restart smbd 
sudo systemctl restart nmbd

৪/ এবার আপনি যেকোনো ফাইল শেয়ার করতে পারবেন। আপনি তিনভাবে ফাইল শেয়ার করতে পারেন। এক, /etc/samba/smb.conf ফাইলটি তে লিখে। দুই, sudo system-config-samba ব্যবহার করে। তিন, সরাসরি রাইট মেনু থেকে।

এক,
sudo gedit /etc/samba/smb.conf দিয়ে smb.conf ফাইলটি খুলুন।  এখন ফাইলের একেবারে শেষে নিচের লাইনগুলো যোগ করুন।
[share]
    comment = Ubuntu File Server Share
    path = /path/of/the/file/or/folder/to/share
    browsable = yes
    guest ok = yes
    read only = no
    create mask = 0755

এখন ধাপ ৩ অনুসরণ করুন।

দুই,
মেইন মেনুতে Samba  খুঁজুন বা টার্মিনালে sudo system-config-samba লিখে এন্টার দিন। যে উইন্ডো খুলব এতে [+] এ ক্লিক করে Basic Tab এ Directory তে path লিখুন বা ব্রাউজ করুন। Share Name এ পছন্দমত নাম দিন। এর নিচে Writable আর Visible এ ঠিক দিন আপনার ইচ্ছামত। Access Tab এ Allow Access to everyone দিন। এবার Ok দিয়ে ধাপ ৩ অনুসরণ করুন।

তিন,
আপনি যে ফোল্ডার শেয়ার দিতে চান অতে কার্সর রেখে মাউসের রাইট বাটন চাপুন। এবার Sharing Option এ ক্লিক করুন। এখানে Share this Folder এ ক্লিক করুন। এবার নিচের দুটি অপশন থেকে আপনার পছন্দ মত ঠিক দিন। এবং Create Share এ চাপুন।

হয়ে গেল শেয়ার।


অনেকসময় দেখা যায় Lan এ শেয়ার হয়েছে ঠিকই কিন্তু পিসি উইন্ডোজে দেখাচ্ছে না। এজন্য উইন্ডোজের অ্যাড্রেসবারে \\hostname লিখে এন্টার দিন। hostname এর জন্য লিনাক্সের টার্মিনালে hostname লিখে এন্টার দিলে hostname চলে আসবে।
e.g. hostname=mini-blogger
So,
\\mini-blogger

বিঃদ্রঃ সহজভাবে samba শেয়ার বোঝানোর চেষ্টা করেছি। তাই ভাষার ভুল ত্রুটি মাফ করবেন। আর  কোন সাজেশন থাকলে কমেন্ট তো আছেই। আমি চেষ্টা করব নতুন কিছু থাকলে যোগ করে দিতে।

Published: By: Jahirul Islam - 7:16 PM

Wednesday, June 14, 2017

Share SWAP Partition on dual boot different Linux

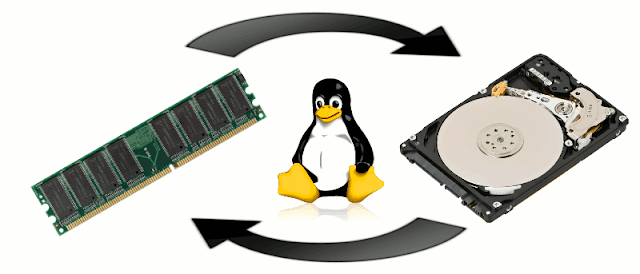
SWAP parter of RAM


In Linux operating system the most common system partitions are 'root' partition and 'swap' partition. This 'swap' partition is like a misty for new Linux users. First of all there will be questions that how much of space is needed for 'swap' partition, is it really necessary, what benefit will be provided etc. But for now we will be discuss how to use single swap on multiple Linux system.

First things first, at beginning check your 'swap' is working or not. For that use 'free' command on terminal.[see on image<check swap>]. If 'Total' of 'Swap' is not 0 then you have working 'swap' partition. If not than your swap is not working.
Check Swap is working or not


I want to clear something now. If you did not create different swap for different Linux OS and selected same partition over and over then your latest install OS will have the working swap. For other OS's system cannot find the 'swap' partition because you change the UUID every time you install another OS.
Now, if you find 'Total' of 'Swap' with 'free' command for every OS you installed, then either you deleted 'swap' partition after install system or UUID is changed. This is no Problem. You just have to do an extra step. If you have a working 'swap' on any OS, boot into that system and go to step 2.

Step 1: Make a swap
Open your terminal. Type 'sudo fdisk -l'. This will show all the partitions the device has. You can use 'sudo fdisk -l | grep swap' to show only swap partition information.  Write down the partition Name/Device listed with swap. Example- '/dev/sda6' [see on image<swap info>].

swap info


Now Type this command on terminal 'sudo mkswap /devs/da6' It will make the swap partition usable and give you a UUID. Write down the UUID.

For make the swap working for the system, we need to change the fstab file. So, type 'sudo nano /etc/fstab'. Here you will see your corresponding system partitions. If there is any line like this 'UUID=842b4ddb-ee76-4e21-b3f3-8a2480144168 none            swap    sw              0       0', just change the UUID with your swap partition's written UUID. If there is no line with swap then
create a line at the end like way before.[No need to change other informations. Just the UUID]. [see on image <add swap>].

add swap


Save the file by pressing Ctrl+O and Enter. Now press Ctrl+X. Reboot the system and check if 'swap' is working or not by 'free' command.


Step 2: Use the swap for other system
At this point I'll assume that you have a working 'swap' partition for any OS and you booted into that OS.

There is two way to add the 'swap' partition on other OS. One is to boot on every OS and change the 'fstab' file. Second way is by changing 'fstab' file from current OS. I'll vote for second one. It is tricky but easy and no need to boot different time. I'll show second method.

Suppose, You have three OS - Ubuntu, Mint, Debian. Working 'swap' is with Ubuntu and you booted into Ubuntu. Type the command on terminal, 'sudo nano /etc/fstab', Copy the whole line with type 'swap'. Example, 'UUID=842b4ddb-ee76-4e21-b3f3-8a2480144168 none            swap    sw              0       0'. You can open a new document and save it for later use.

Now mount you other OS's drive by simply clicking on drive like '40 GB Volume'. This drive should mount on either /mnt or /media/user. Find where mounted and go there. Open terminal here and execute this command 'sudo nano /etc/fstab'. If there is any line contain swap type then delete it and paste the copied line. Save and exit by pressing Ctrl+O & Enter & Ctrl+X.

Do this for other OS.

Boot into other OS's and check if 'swap' is working or not by 'free' command.


Thank You for reading. I am open for any suggestion.
Published: By: Jahirul Islam - 12:53 AM

Monday, May 1, 2017

কিভাবে Linux Mint এ Ethernet কানেক্ট করব!


Linux Mint হল Linux জগতের দ্বিতীয় জনপ্রিয় ডিস্ট্রিবিউশন। এটি মূলত Ubuntu এর LTS মানে Long Term Support এর উত্তরসূরি। তাই এটি অনেক নিরাপদ আর স্থিতিশীল। আর Cinnamon ডেস্কটপ এনভাইরন্মেন্ট একে করেছে Windows ব্যবহারকারীদের কাছে স্বাচ্ছন্দের।

আজকে কিভাবে এতে Static Ethernet মানে Broadband কানেকশন দেওয়া যায় তা দেখব।

১। প্রথমে ডানে নিচে Network আইকনে ক্লিক করে Network Connections অপশনে ক্লিক করুন।


২। এখন খোলা উইন্ডোতে Wired connection 1 নামে Ethernet এর নিচে একটি connection থাকবে। ওতে ক্লিক করুন। এখন Edit সিলেক্ট করুন।


৩। খোলা উইন্ডোতে অপশনগুলো থেকে IPv4 Settings সিলেক্ট করুন।


৪। এবার এর নিচে Method এর সাথে ড্রপ-ডাউন মেনু থেকে Manuel সিলেক্ট করুন।


৫। এতে উইন্ডোটি নিচের মত আসবে। এখান হতে Add এ ক্লিক করুন।


৬। এবার একটু কৌশল করতে হবে। কারণ আপনাকে IP Address, Subnet Mask, Default Gateway দিতে হবে। এই তথ্যগুলো যদি আপনি না জানেন তাহলে নিছে দেখুন <কিভাবে windows এ Ethernet এর তথ্য জানা যায়>
Add Button চাপার পর Address এর ঠিক নিচের খালি জায়গায় Double ক্লিক করুন।
এখন আপনার IP Address লিখুন। যেমন-172.16.200.25
এবার Tab বাটন একবার চেপে Subnet Mask লিখুন। যেমন-255.255.255.0
আবার Tab চেপে Default Gateway দিন। যেমন-172.16.200.1
এবার Enter চাপুন।
এরপর DNS servers এর ডান পাশের খালি ঘরে 8.8.8.8, 4.2.2.2 লিখে নিচের Save বাটন চাপুন।


৭। আপনার পিসি এখন ইন্টারনেটের সাথে কানেক্ট হয়ে যাবে। না হলে Network Off করে আবার On করুন।


কিভাবে windows এ Ethernet এর তথ্য জানবেনঃ
প্রথমত, আপনি আপনার ইন্টারনেট প্রোভাইডারের কাছথেকে এই তথ্য গুলো জানতে পারেন আবার আপনার নিজ পিসিতে যদি আগে থেকে প্রোভাইডার এসব সেট করে দিয়ে থাকে তাহলে নিচের পদ্ধতিতে জেনে নিতে পারেন। আপনার ইন্টারনেট যদি Static type এর হয় মানে Manual কানেকশন হয় তাহলেই এই মেথড কাজ করবে।


তো, আজ এপর্যন্তই। আশা করি ভবিষ্যতে আবার দেখা হবে নতুন কোনো টপিক নিয়ে।

বিঃদ্রঃ
১। আপনার মূল্যবান মতামত কমেন্টে দিতে ভুলবেন না।
২। ভূল-ভ্রান্তি ক্ষমাসুন্দর দৃষ্টিতে দেখে শুধরে দিলে উপকৃত হব।
Published: By: Jahirul Islam - 4:13 AM

Thursday, February 9, 2017

ফন্ট পরিবর্তন করিঃ কম্পিউটার(windows registry hack)


আমরা কম্পিউটার ব্যবহারের সময় স্কিনে যে ফন্ট দেখি সেটা Microsoft এর ডিফল্ট ফন্ট। সাধারণত windows আমাদের ফন্ট পরিবর্তন করতে দেয় না। কিন্তু, আমরা একটু বুদ্ধি খাটিয়ে এই কাজটি সহজে করতে পারি। আর সেই পদ্ধতিটি হল Registry পরিবর্তন করে।

Registry হল “The Windows Registry is a hierarchical database that stores low-level settings for the Microsoft Windows operating system”[1]. মানে Registry হল এমন একটি জায়গা যেখানে Microsoft Windows operating system এর low-level settings মানে মেশিন লেভেল এর সেটিংস থাকে। সহজ ভাবে, যেখানে সব সেটিংস থাকে।

পদ্ধতি ১ঃ
১/ প্রথমে run এ যান। run এ যেতে win+R চাপুন।
২/ এখন regedit লিখে Enter চাপুন। এবং Yes দিন। এইরকম একটি ছবি দেখতে পাবেন।


৩/ এবার [HKEY_LOCAL_MACHINE\SOFTWARE\Microsoft\Windows NT\CurrentVersion\FontSubstitutes] সাব-ফোল্ডারে যান।


৪/ এখন FontSubstitutes এর আন্ডারে Segoe UI নামের একটি রেজিস্ট্রি আছে। এটাতে Double Click করুন। Value Data হিসেবে আপনার ইচ্ছানুযায়ী ফন্ট এর নাম লিখুন। ওকে দিন।


৫/ এবার পিসি রিস্টার্ট দিন। আর দেখুন ম্যাজিক।


পদ্ধতি ২ঃ
এই পদ্ধতিতে উপরের মত এত ঝামেলা পোহাতে হয় না বার বার। একবার করে নিলেই হয়। এরপর শুধু Change && Run.
১/ প্রথমে এই ফাইলটি ডাউনলোড করে নিন। এবং সরাসরি ধাপ ৫ এ যান।
অথবা,
Notepad ওপেন করুন এবং নিচের মত করে হুবুহু লিখে ফেলুন বা Ctrl+C && Ctrl+V.

Windows Registry Editor Version 5.00

[HKEY_LOCAL_MACHINE\SOFTWARE\Microsoft\Windows NT\CurrentVersion\Fonts] 
"Segoe UI (TrueType)"=""
"Segoe UI Black (TrueType)"=""
"Segoe UI Black Italic (TrueType)"=""
"Segoe UI Bold (TrueType)"=""
"Segoe UI Bold Italic (TrueType)"=""
"Segoe UI Historic (TrueType)"=""
"Segoe UI Italic (TrueType)"=""
"Segoe UI Light (TrueType)"=""
"Segoe UI Light Italic (TrueType)"=""
"Segoe UI Semibold (TrueType)"=""
"Segoe UI Semibold Italic (TrueType)"=""
"Segoe UI Semilight (TrueType)"=""
"Segoe UI Semilight Italic (TrueType)"=""

[HKEY_LOCAL_MACHINE\SOFTWARE\Microsoft\Windows NT\CurrentVersion\FontSubstitutes]
"Segoe UI"="Arial"

এবার শুধু Arial এর জায়গায় পছন্দ মত ফন্টের নাম লিখুন।
২/ এখন Ctrl+S চাপুন। পছন্দমত নাম দিন এবং শেষে .reg লিখে দিন। ওকে করুন ।
৩/ এবার File এ Double Click করুন এবং OK OK দিন।
৪/ এবার পিসি রিস্টার্ট দিলেই কেল্লাফতে।
৫/ এরপর যখনই ফন্ট পরিবর্তন করতে ইচ্ছা হবে .reg file টা notepad এ ওপেন করে "Segoe UI"="Arial", এখানে Arial এর জায়গায় পছন্দ মত ফন্টের নাম এবং ২, ৩, ৪ ধাপ পুনরায়।


Note: Feel free to comment

রেফারেন্সঃ


Published: By: Jahirul Islam - 3:32 PM